Showing posts with label tutorials. Show all posts

Friday, April 20, 2012

Tutorial: party pompoms

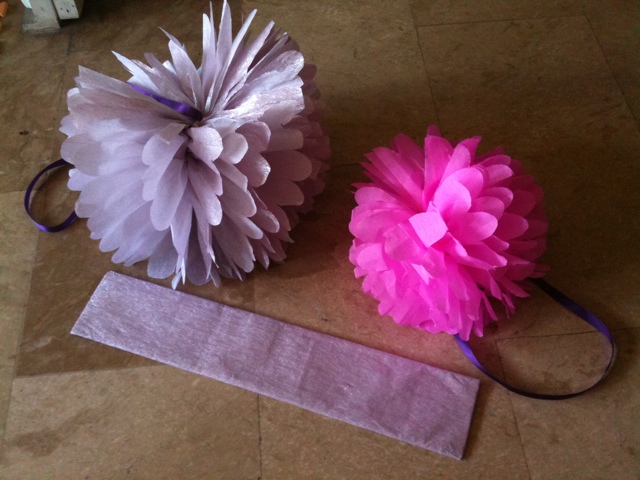
 Decorative party pompoms.

Decorative pompoms are an easy and fun way to glam up any themed party, and I just learned how to make them in time for Caitlin's birthday bash, thanks to my sister-in-law who's a natural DIY queen when it comes to event styling.


What you'll need:


Crepe paper in any color
Thin wire or floral stem (#26 or #30)
Matching strings or satin ribbons

 Prepare your materials. I bought all these at National Bookstore.

Directions:

 
Decide on how big or small you want your pompoms to be then cut your paper into rectangle pieces, the width will determine its diameter when opened.


For medium pompoms, making use of a full crepe paper, that's about 12 pieces of 10" x 12". You'll make a smaller one when you use 10 pieces of the same size.


For twice that size, cut 12 pieces of 11.7" x 15.5". The excess, which measures 4" x 4.3", may still be made into tiny pompoms.


Large and medium pompoms.

Place the rectangle pieces together and trim two opposite ends to make scallop edges. Although you can do it freestyle, it's best to work with a pattern, especially if you are making a lot of pompoms.

 Scallop edge.

Then, starting from one straight edge going to the other side, make a folded fan out of it, roughly half an inch in size.


Secure with a thin wire in the middle and place a ribbon.


Starting from one side, gently peel the crepe paper one by one as if opening a banana. Finish it off on the other side.


There you go.


You can also use Japanese paper, but I find crepe papers easier to handle because they are thicker so they don't tear easily. Crepe papers, the basic ones, are also less expensive than Japanese papers.

Happy crafting!

- Mommy Smiley


Friday, December 16, 2011

Tutorial: diaper cover with frills


The design is not original. You'll see this kind of diaper cover in a lot of stalls selling clothes for infants. But what made this extra special is the fact that it was made with lots of love.


The free diaper pattern and tutorial posted here is courtesy of Prudent Baby. I love her site, and often visit for free sewing patterns and tutorials. What's more wonderful about it is that she has a baby girl, too! So Prudent Baby creates a lot of stuff for girls from infant to toddlers. 


So, do you want to try it out? Click and print out the free diaper pattern and cut your diaper cover pieces. But save the elastic for last.


For the added frills, here's the tutorial.  

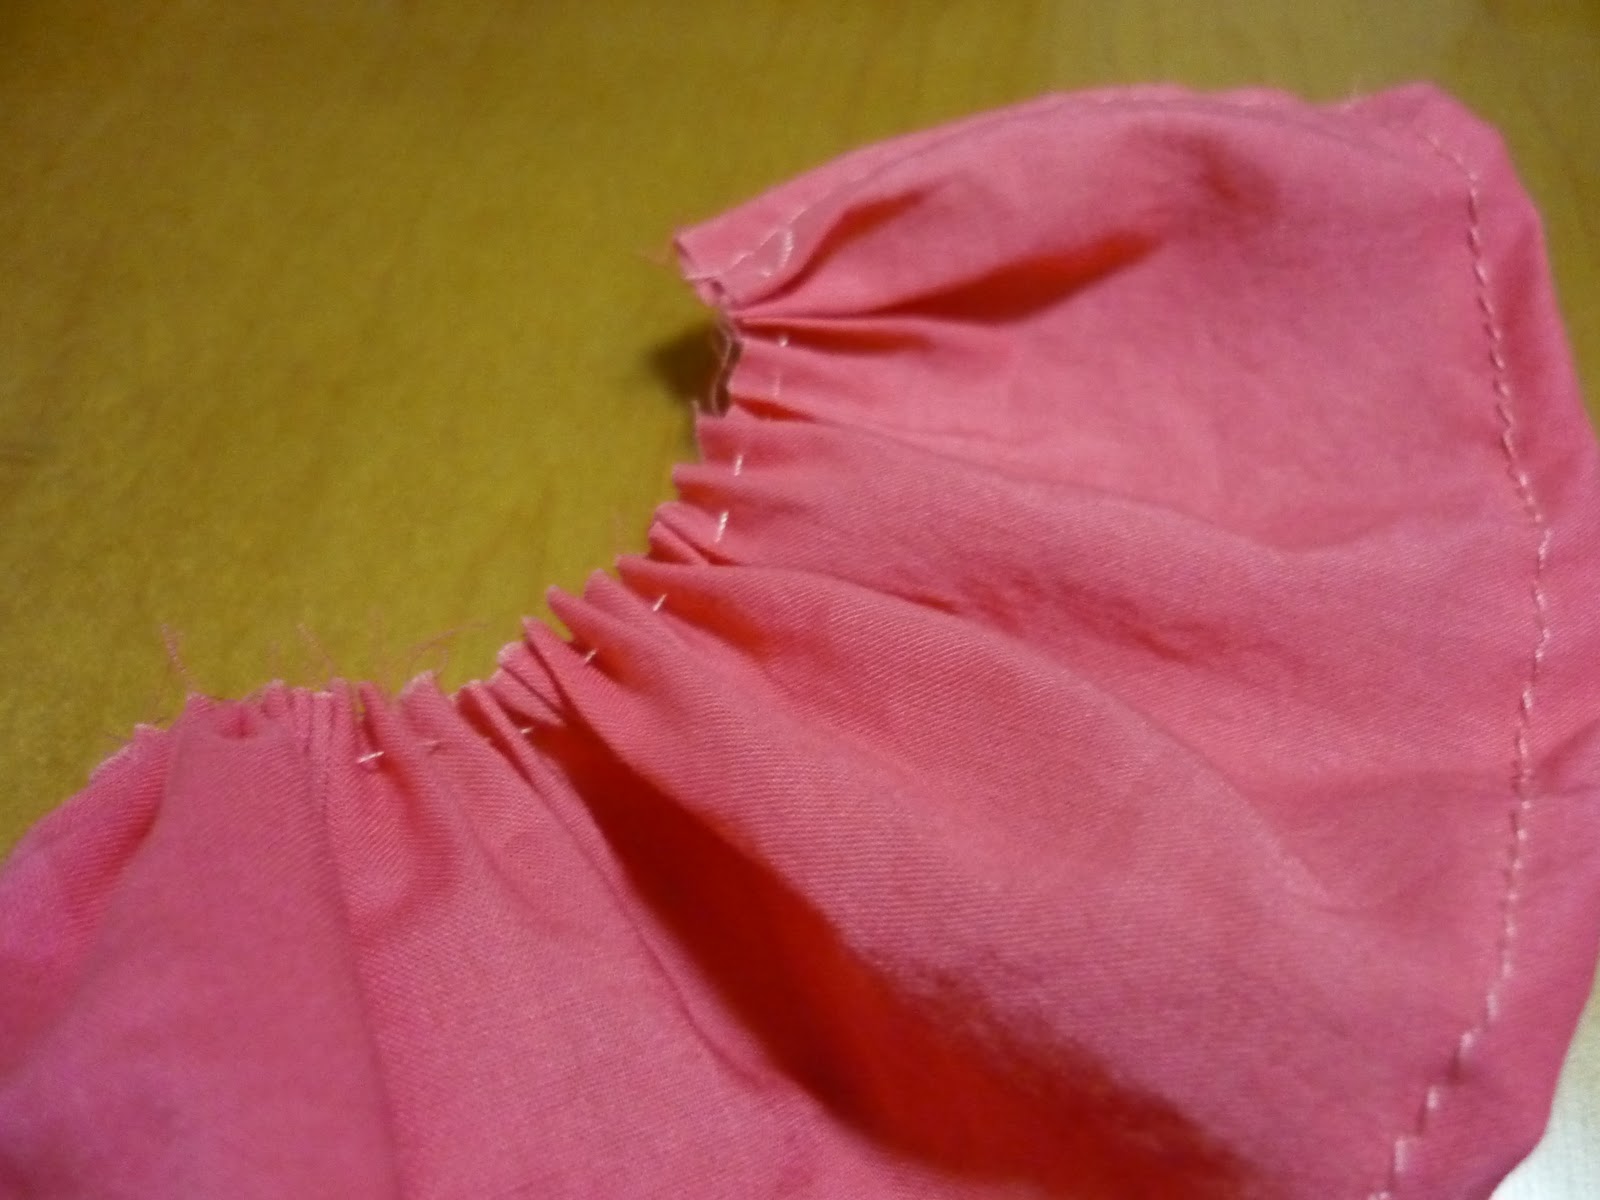
Cut three 3 inches x 30 inches strips and sew the bottom and side edges using a sewing machine. For fuller frills, you may lengthen the strips to 3" x 50". Hand stich a running stitch on the top and pull to gather the fabric together.

 
Lay the right side of your top strip on the right side of your back diaper cover only, making sure that you've covered the lenght of it. Sew the strip an inch above the holes for the legs. 

Sew your second and third strips.
 
For added embellisment, make frayed rosettes. I've posted the tutorial here. But I modified it here. Instead of gluing the fabric, I decided to sew one side of it.
 
Secure by hand stitching the back. Hand sew the frayed rosettes on your front diaper cover.

Once you have your frills and frayed rosettes sewed on, put in the elastic. And there you have it.

Front piece.


Back piece.

And here is my model, posing for mommy.


- Mommy Smiley

Thursday, December 8, 2011

Tutorial: onesie with froufrou

Pink onesie with froufrou.

Here's another sewing project that's too irrisistible to miss out on. Remember the free onesie pattern? Oh, how you can make so many cute little girl's outfit with that.

Caitlin on a black and white ensemble with matching headband.

Another take on the onesie with tutu. In this case, however, I assembled the onesie first before I sewed the tulle all over it.

Now, here's another design idea by CutieTots Shop.

Pink onesie with froufrou by CutieTots Shop.

It's all about the froufrou, and I made it only by accident. Below is the step-by-step guide.

What you'll need:

- less than 1/4 yard soft tulle in the color of your choice
- matching thread

Cut the soft tulle in strips of 4.5 inches x 85 inches. The longer and wider the strip, the fuller your froufrou will be.  

Fold the strip in half and hand sew a running stitch in the middle. When you pull the thread, the tulle will gather in the middle as seen on the photo. Once you've reached the end of the strip, secure in place.

Another view.

Then you'll have this.


After you finish making your froufrou, stitch it in place of your onesie like such.


What's missing here is my model. I'll have this blog updated once I get her to wear it. 

Happy sewing!

- Mommy Smiley

Monday, December 5, 2011

Tutorial: DIY invitations

When inspiration hits you, grab it.

I saw a Christening invitation shaped as a onesie on Facebook once. But instead of asking where she got it, I googled for an invitation pattern so I can make it myself in time for Caitlin's baptism. With the advent of the internet, you can find almost anything online. True enough, I saw what I was looking for here.

Once you have the pattern printed out, just buy the materials at your local bookstore and leave everything to your imagination.
Pattern pieces.

Some scrapbooking materials I had laying in the house.

DIY invitations with my handwriting for Caitlin's baptism.

Mix and match buttons and ribbons.


For Caitlin's first birthday party, I plan to do more DIY invitations. I am still undecided, however, as to the party's motif so let me leave that for next year.

- Mommy Smiley

Monday, November 28, 2011

Tutorial: baby dress

It's one of those days when Caitlin naps thrice in a day that I get to have some mommy time. So for today, I sewed another dress for her. Mommy time is still a bit about her at times.


The idea for this dress came from Mommy Raquel who showed me a link on Facebook selling clothes for baby girls.
Baby dress by CutieTots Shop

Inspired again, I immediately went shopping for textile at Fabric Warehouse in Libis, Quezon City.
These are my cool finds. I love the nautical-inspired fabric. I am eager to create a matching mommy and baby outfit with it. Watch out for this page soon.
It took me six hours to piece this dress together, from drawing the pattern to taking the final picture and changing soiled nappy in between. The sewing time usually shortens once you get the hang of it.
Anyway, eager beaver as I could be sometimes, I opted to work with what I have just so I can get started. As you'll see, I wasn't able to use matching threads. But it still worked for me.
For the free baby dress pattern, Small Dream Factory offers a simple design for four to six-month olds. Check the quick tutorial here.
Again, I worked with what I have so I modified the front part that calls for a zipper and instead added about two more inches at the shoulder area of the back piece to make room for snap-on buttons.
Plus, I embellished with frayed rosettes and modified (for lack of a better sewing term) the ends.
In case you have hours to spare, try this out, too.

What you will need:

- less than 1/2 yard of fabric for the dress. I used non-stretch Cotton Voile.
- about 1/4 fabric for the lining. I used Swiss Voil in cream.
- sewing accessories such as scissors, pins, threads, and markers.
- glue gun and stick for the frayed rosettes.
Print the free baby dress pattern. I put one centimeter seam allowance all over the pattern because it is not included here. For Caitlin's current size, however, it was not necessary after all.
Since I wanted a two-toned baby dress, I marked the lower portion where I will put the other fabric.
My pattern pieces with cream lining. The strips on the left side will serve as armhole binding.
Pin the blue fabric on the yellow one and sew. Do the same for your back piece.
So it'll look like this.

You may choose to add binding as seen on the armholes or neatly fold the fabric and sew as seen on the neck.

 It'll look like this. Finish sewing the top of shoulder.

Make a bias tape and cut into strips of 2" long. Click here for the tutorial on how to make a bias tape.

Fold the bias tape pieces in half, pin them in between your lining and front fabric, and sew.

Look from the inside (wrong side) before sewing.

Pin both sides and sew.

Make two frayed rosettes. Check out the free frayed rosettes tutorial here.

Place them here and hand sew in place.

And there you have it. You may either sew in buttons or put snap-on buttons on the shoulder. This pattern may be adjusted to fit your growing baby.
See if it fits her and make the necessary adjustments. In my case, I had to shorten the dress a bit.

Oopppsss. Too short this time. I need to adjust it again then have snap-on buttons added at the Kamuning Market.

Up next, I'll be making a matching diaper cover. Watch out for it. =)

- Mommy Smiley